One of my favorite things about having a die cutting machine is that I can usually whip up small gifts for the kids for every holiday and special events. As I mentioned before my mother always made holidays a big deal for my sisters and I. OK let’s face it, she still gives us small gifts on special holidays. I’m pretty sure I asked my mom to stop when I turned 18 but I don’t think she got the memo. HA! Who am I kidding? I don’t think I’ll be able to stop once my kids turn 18. The thought of them growing up scares me and turns me into one emotional mama so I’m going to pretend they’re going to stay this little awhile longer by creating new memories with activities to do for every holiday as long as possible. With the help of my Silhouette Cameo and Silhouette double-sided adhesive I made the kids 
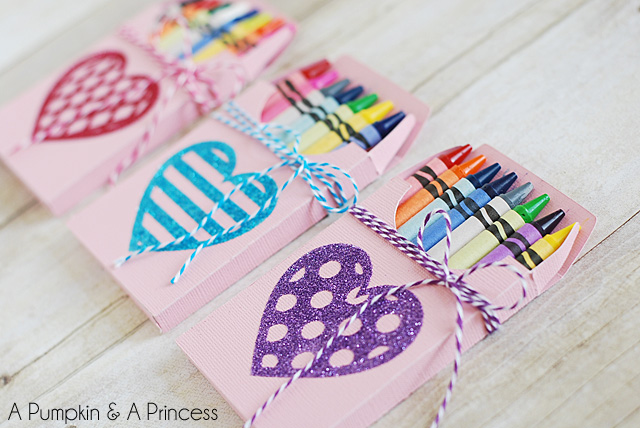
Crayon Box Valentines to give them on Thursday.

DIY Crayon Box Valentines


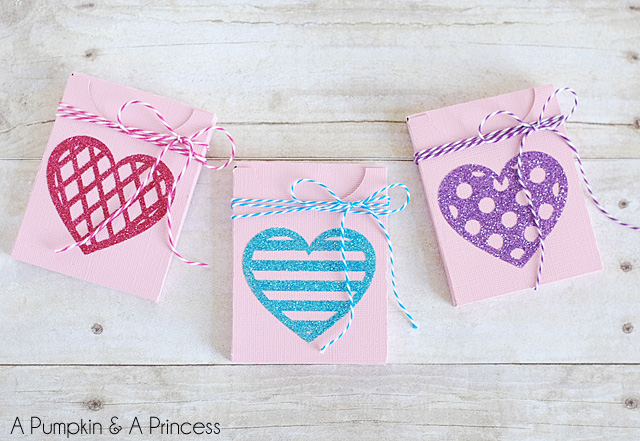
We plan to spend the day making crafts and going on a Valentine scavenger hunt, so I thought the crayons would be a fun gift for them. Its something sweet, simple, and practical. Its also a non-candy Valentine idea that I’m sure I’ll continue to reuse for years to come.
DIY Crayon Box Valentines
If you don’t have a die cutting machine 
you can use a crayon box as a template to trace onto thick cardstock. Then glue the sides together (you’ll be able to see the left and right side tabs overlapped where they were glued). Also note that the Crayon Box Valentines I made held 8 crayons, not 24 like a standard crayon box. You can find smaller 8 pack crayon boxes or make them with the 24 pack at most stores.
DIY Crayon Box Valentines
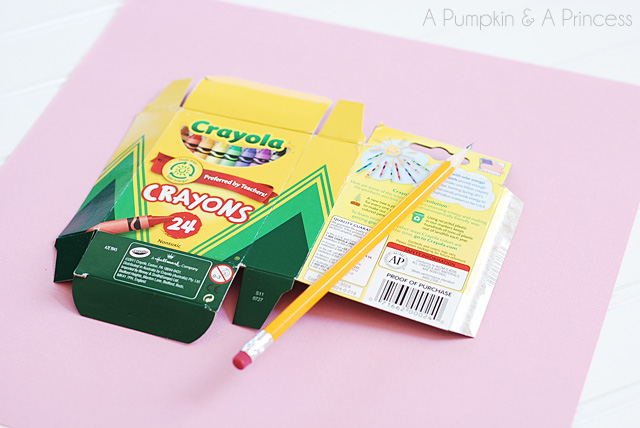
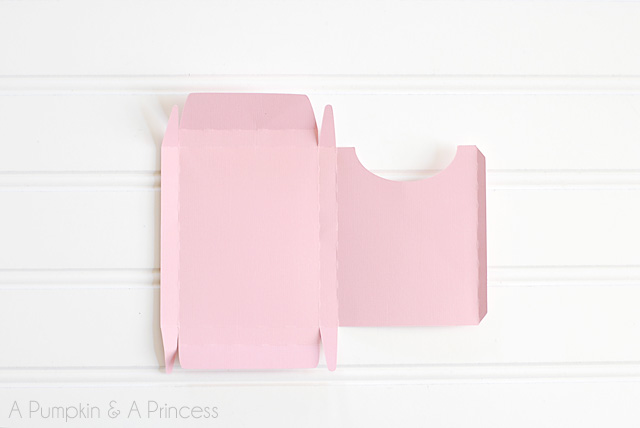
1. To make the crayon box valentines cut your box out of cardstock.
DIY Crayon Box Valentine
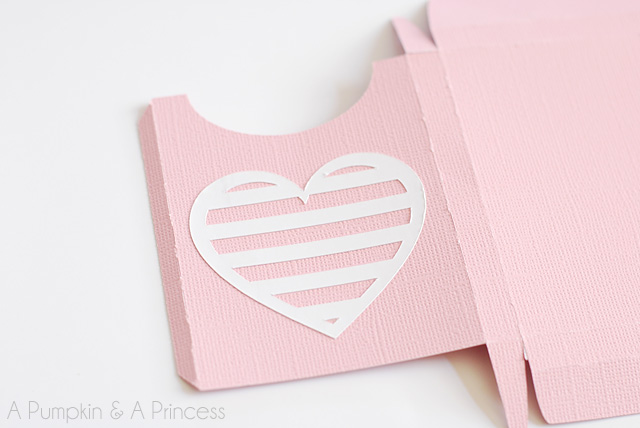
2. I then cut various decorative heart shapes out of the Silhouette double-sided adhesive. Again you could buy the double-sided adhesive and trace your shapes or use a punch to cut the shapes out.
DIY Crayon Box Valentines
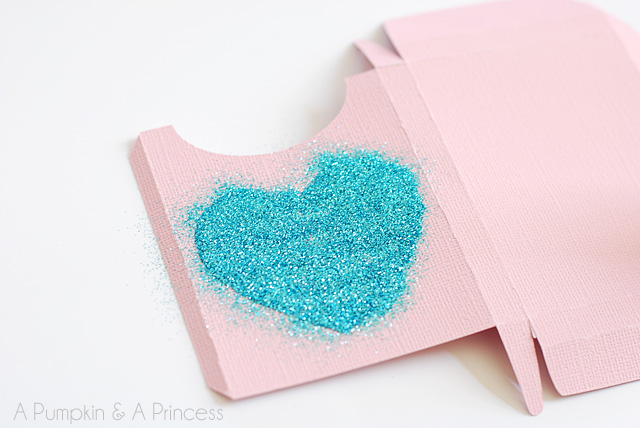
3. Remove the top layer and add glitter.
DIY Crayon Box Valentines
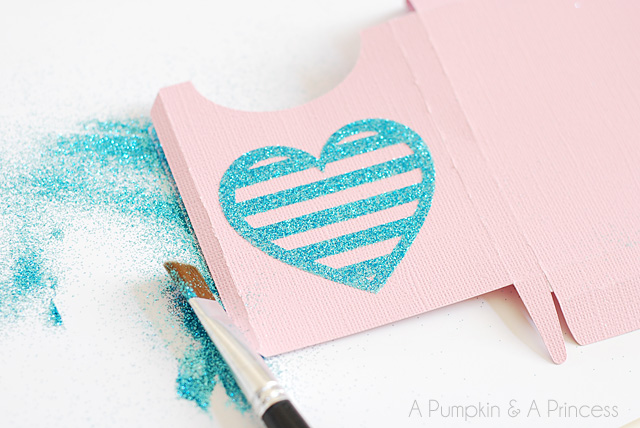
4. Use the brush that comes in the kit to remove the excess glitter.
DIY Crayon Box Valentines
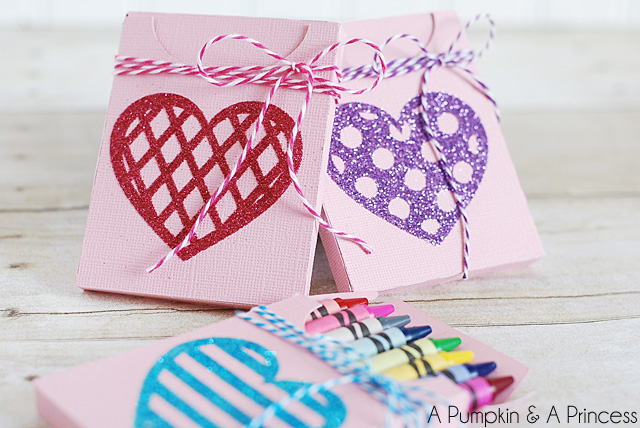
5. Then glue your tabs together to close your crayon box. Now it’s ready to be filled with colorful crayons!
DIY Crayon Box Valentines
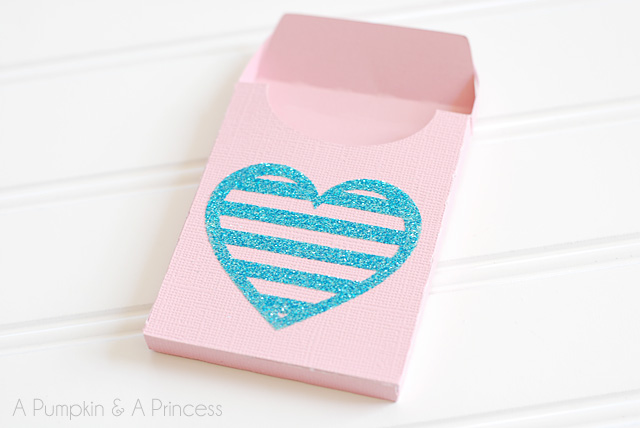
This is a great non-candy valentine idea that can also be used as a birthday gift or party favors.
DIY Crayon Box Valentines
Share your opinion on the comments


porta-celular-de-origamiIComo amante del origami esta idea me parece ¡genial!. Además, es muy fácil de hacer y solamente necesitas una hoja de papel puedes elegir alguna de los diseños papel deco de craftingeek.


Start out with a square piece of patterned scrapbook paper. A 4×4 or 6×6-inch square should work for a regular iPhone.I Try DIY | Origami StandTo start, fold the square in half.I Try DIY | Origami StandThen, fold again in half the other way.I Try DIY | Origami StandOpen up all the folds, then fold into quarters. First, fold the bottom edge towards the center.I Try DIY | Origami StandThen, fold the top edge towards the center.I Try DIY | Origami StandNext, you will need to make some creases. Start by making a doggie ear.I Try DIY | Origami StandUnfold, then make another doggie ear in the opposite direction.I Try DIY | Origami StandRepeat on the other side. Make a doggie ear fold.I Try DIY | Origami StandUnfold, then make another doggie ear fold in the opposite direction.I Try DIY | Origami StandUnfold. Make sure all creases are crisp.I Try DIY | Origami StandRotate your paper 90 degrees. Lift one corner, and tuck it inward. We’ll call this the POCKET.I Try DIY | Origami StandNext, pinch the two corners towards each other until the paper naturally folds into itself.I Try DIY | Origami StandTake the center, and tuck it under that pocket you created earlier.I Try DIY | Origami StandRepeat on the other side. Start by creating that pocket.I Try DIY | Origami StandPinch the corners together to create that natural fold.I Try DIY | Origami StandTuck the fold into the pocket.I Try DIY | Origami StandLast step, make the center fold crease even crisper. This is where your phone will be resting.I Try DIY | Origami StandFlip over, and you’re all done!I Try DIY | Origami StandPlace your phone on there, and you’re good to go!I Try DIY | Origami StandSee! Wouldn’t this be a cute wall installation? I really should try making a large-scale version!I Try DIY | Origami Standsours: itrydiyxx


Power through~ scrubbing by attaching a sponge to a drill. It'll do all the hard work while conquering tough stains — you just point and press.  

What you'll need: attachable scrubbing pads ($14.95 on Amazon), a bolt, washer nail, and machine screw set ($10.99 on Amazon), and a drill ($28.29 on Amazon or $18.73 on Walmart).
Check out the full tutorial here!